Hello SharePointers…
One of the most regular questions I seemed to get asked while delivering any of our SharePoint Training Courses is “How can we add a Facebook Feed to our website?”. This is due to the change in the way we share information and communicate within our business environment these days so here is a small guide on how to add your Facebook Page as a Feed within SharePoint 2013 or Office 365.
(Note : This can also be done in SharePoint 2010 and 2007)
(Note : Please click images for a Larger and Clearer View)
1. The first step is to navigate to the Facebook developers page below to get your IFrame or Html code. Its a good idea to know the URL of your Page as it appears before going to the developers site, For example my Facebook Page URL is : https://www.facebook.com/SharepointTrainingUK
https://developers.facebook.com/docs/plugins/like-box-for-pages
2. Paste your Facebook Page URL into the box specified and ensure your feed appears within the demo window. (If your Feed does not appear check your URL is correct).
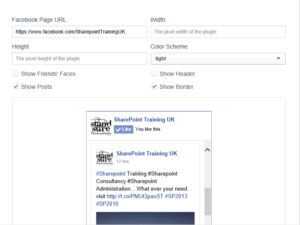
3. We can now configure the Feed to appear however you want, by default the “Show Friends Faces” will be select however untick this if you want and select the option for “Show Posts“. This will display all of your posts from your facebook page onto the small widget. Also you can modify the width and the Height here if you know how big you need it to appear within your SharePoint Site. For this example I left this as default.
Note : There is more advanced options available which you will see below the configuration settings you may want to take note of.
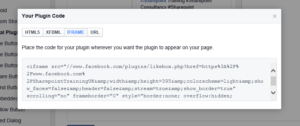
4. Once you have configured your widget, its time to get the code. Click Get Code
![]()
5. Select the tab for IFrame, and copy the code. Open a blank Notepad and Paste the Code.
(Note : You can use HTML if you prefer)
6. Save the NotePad file with the Facebook Code you pasted to your desktop as Facebook.txt file.
7. Now that you have got te code for the Facebook Widget its now time to add this to SharePoint, Now there is a few ways of doing this however this is one of the easiest and you can change this to match your requirements later. Open SharePoint Designer or the Browser and Navigate to the Site Assets folder. in my example I will use SharePoint Designer. Add upload/Import the Facebook.txt File to the Site Assets Library.
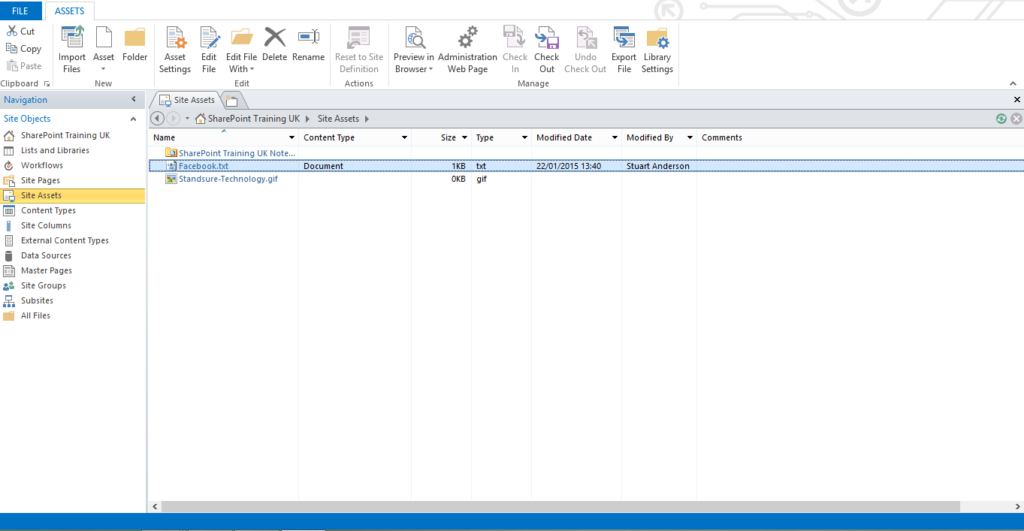
8. So that we can use this code we need to capture the files URL/Location within SharePoint the Easiest way to do this in Designer is right click and select properties. Then copy the Location. If you are using the browser right click the file name within Site Assets and Copy Shortcut.
9. The Last Step is to Navigate to the SharePoint Page you wish to add the Widget to, and Add the Content Editor Webpart to the page. Edit the Webpart and Paste the Files URL Location into the Editor and Click OK.
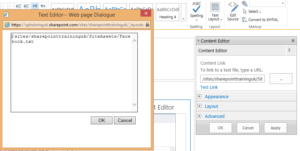
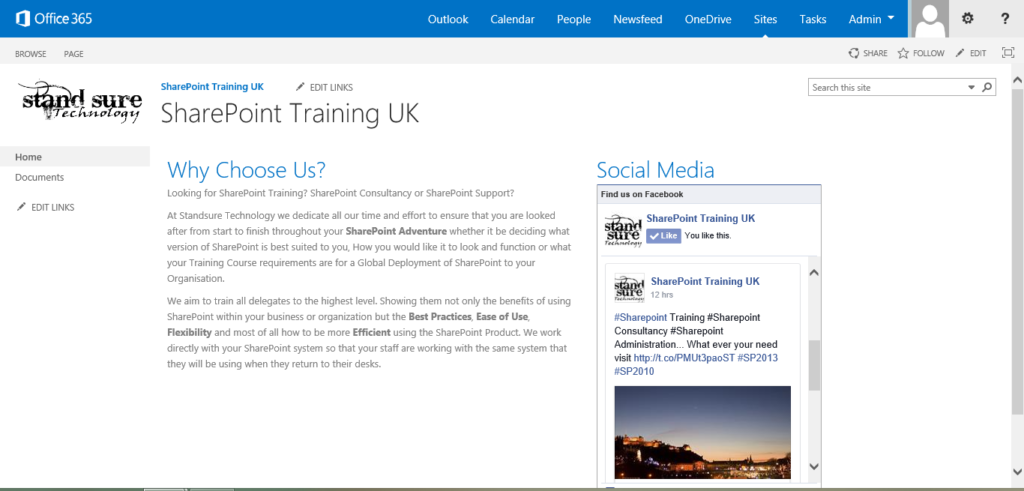
Your Facebook widget will now be visible and that’s how easy it can be to add the Facebook Feed to your SharePoint Environment. Next Steps is to modify the Heading, width and Height for example.
I hope that was helpful as its certainly one of the most popular questions I get asked all the time when im delivering Training Courses or Consultancy.